
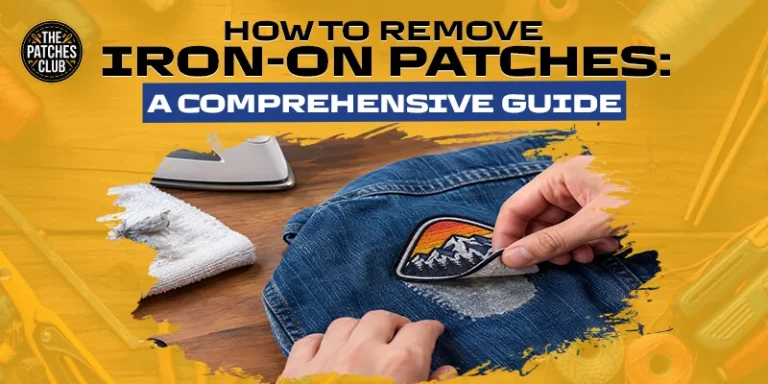
How to Remove Iron-On Patches: A Comprehensive Guide
Iron-on patches are a simple way to customise jackets, shirts, bags, uniforms, and other items. But what happens when you want to remove one? Removing an iron-on patch is possible, but rushing the process can damage the fabric. You may leave behind sticky glue, burn marks, or even holes.
The good news is that you do not always need to replace the item. With the right method and a little care, you can remove an unwanted patch and prepare the fabric for a new design.
Can You Remove an Iron-On Patch?
Yes, most iron-on patches can be removed. However, the result can vary depending on the fabric and adhesive. Some patches come off cleanly, while others leave glue behind.
The fabric also matters. Cotton and denim can usually handle gentle heat better than delicate materials. Before starting, check the care label on the item. If you want a clean finish with fine details and small text, consider custom woven patches.
This can help you avoid using a temperature or method that could damage the fabric. It is also a good idea to test your chosen method on a small hidden area first.
Design Your Custom Patches Right Now!
Method 1: Use an Iron to Remove the Patch
Using heat is one of the most common ways to remove an iron-on patch. Start by placing the item on a flat, heat-safe surface. Turn the iron to a suitable temperature for the fabric.
Place a thin cloth over the patch. This helps protect the fabric from direct heat. Press the iron over the cloth for a few seconds. The heat should soften the adhesive behind the patch.
Do not leave the iron in one place for too long. Too much heat can scorch some fabrics. After heating the area, carefully lift one corner of the patch with tweezers or a blunt edge.
If it does not move easily, apply a little more heat. Do not force it, as pulling too hard can damage the fabric. Continue working slowly until the patch comes away.
Method 2: Use a Hairdryer
A hairdryer can be a useful option when you want more control over the heat. Set the hairdryer to a high heat setting and point it towards the back of the patch.
Move it around rather than keeping the heat in one place. After a short time, check whether the adhesive has started to soften.
Once the glue becomes soft, carefully lift a corner of the patch. Keep applying heat as you slowly pull the patch away. This method can take longer than using an iron, but it may be easier to control.
Method 3: Remove the Patch From the Back
Another useful approach is to heat the fabric from the reverse side. Turn the item inside out if possible. Place a clean cloth over the back of the patch area. Apply gentle heat with an iron for a few seconds. Then turn the item back and carefully lift the patch.
Heating the adhesive from behind can help soften the glue without putting direct heat on the front of the patch. This can be useful when the patch has a detailed design that you want to keep. If you want your design to have a raised and eye-catching look, consider custom 3D embroidered patches.
How to Remove Leftover Adhesive
Removing the patch is only half the job. You may still see sticky glue on the fabric after the patch has been removed. Start by allowing the fabric to cool. Once it is safe to handle, gently rub or lift away loose adhesive. For stubborn glue, you can consider a fabric-safe adhesive remover.
Always read the product instructions before using it. Test it on a hidden area first to make sure it does not affect the fabric colour. Avoid using harsh chemicals without checking their effect on the material. Once the adhesive is gone, wash the item according to its care label.
What If the Patch Will Not Come Off?
Some iron-on patches are attached with very strong adhesive. If the patch refuses to lift, do not keep pulling. You could stretch or tear the fabric.
Apply controlled heat again and give the adhesive time to soften. You can also work on one small section at a time instead of trying to remove the entire patch at once.
If the item is valuable, delicate, or difficult to replace, consider getting professional help rather than taking a risk. If you want a casual and stylish patch for jackets, jeans, or bags, consider custom denim patches.
How to Avoid Damaging Your Clothes
The biggest mistake people make is using too much heat. Always check the fabric care label before applying heat. Do not place a hot iron directly onto delicate fabric unless the care instructions allow it.
It is also important to avoid sharp tools. A knife or blade may cut through the fabric while you are trying to lift the patch. Work slowly and keep checking the fabric as you go. If you notice discolouration, melting, or unusual marks, stop and allow the material to cool.
What Can You Do After Removing an Iron-On Patch?
Once the old patch is gone, you may want to give the item a fresh look. A new patch can cover an old patch area if there is slight adhesive residue or a visible mark.
You can choose from embroidered, woven, PVC, or other patch styles depending on the item and design. The right patch size and backing can make a big difference to the final result.
If you are ordering custom patches, make sure your artwork is clear and suitable for the chosen size. A professional patch maker can also help you choose the right backing and finish.
Conclusion
Removing an iron-on patch does not have to be difficult. The key is to use controlled heat, work slowly, and avoid pulling the patch away with force. Once the patch is removed, deal with any leftover adhesive carefully and check the fabric before applying anything else.
If you are ready to replace an old patch with a fresh custom design, The Patches Club can help. From custom embroidered patches to other patch styles, we focus on quality, reliable service, and fast turnaround.

FAQs
Frequently Asked Questions
Yes. Use gentle heat and remove the patch slowly to reduce the risk of fabric damage.
Heating the adhesive with an iron is one of the most common methods.
Yes. A hairdryer can soften the adhesive and give you better control over the heat.
Gently lift loose glue and use a fabric-safe adhesive remover for stubborn residue.
It can. Some fabrics may show adhesive residue, colour changes, or an outline after removal.
Yes. Denim can usually handle controlled heat, but you should still check the care label first.
Yes. Heating the fabric from the back can help soften the adhesive and make removal easier.
The adhesive may be very strong. Apply controlled heat again and slowly work around the edges.
Yes. A new patch can sometimes cover the previous patch area and give the item a fresh look.
The Patches Club provides custom patch services with quality production, fast turnaround, and free quotes.
How to Remove Iron-On Patches: A Comprehensive Guide
Iron-on patches are a simple way to customise jackets, shirts, bags, uniforms, and other items. But what happens when you…
How to Apply Iron On Patches: A Step-by-Step Guide
Want to give an old jacket, bag, or pair of jeans a fresh look? Iron on patches are one of…

10 Best Custom Patch Companies in the UK 2026
Need custom patches in the UK but unsure which company to choose? The right patch maker can turn your logo,…