
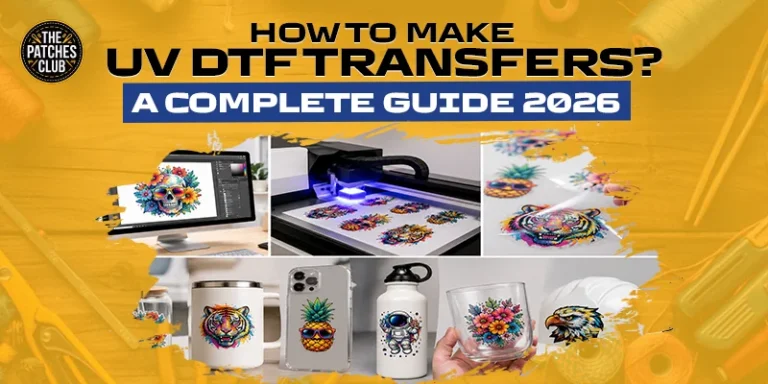
How to Make UV DTF Transfers? A Complete Guide 2026
Want to print bright, long-lasting designs on glass, metal, plastic, wood, and more without using heat? UV DTF transfers are now one of the easiest ways to add bright, sharp designs to hard surfaces. If you run a small business or make personalised products at home, learning to create UV DTF transfers can help you achieve professional results easily.
The process is simple once you understand the materials and the correct order of each step. This guide includes all you need to know. It covers the equipment, printing, laminating, applying, and caring for UV DTF transfers. By the end, you’ll feel confident making transfers that look great and last for years.
What Are UV DTF Transfers?
UV DTF transfers are printed designs using UV-curable inks on special transfer films. The design is first printed on a film. Then, it’s transferred to a hard surface with adhesive film. Unlike traditional DTF printing, UV DTF transfers do not need heat pressing. The design attaches firmly with pressure. If you need your logo or artwork converted into a stitch-ready embroidery file, consider our Embroidery Digitizing Service for accurate and high-quality results.
It’s perfect for decorating mugs, bottles, acrylic signs, phone cases, glass jars, metal items, plastic containers, wood, and many other smooth surfaces. Because the ink is cured with UV light, the finished print is waterproof, scratch-resistant, and full of colour.
Design Your Custom Patches Right Now!
Materials You'll Need
Before you begin, make sure you have the right supplies. A UV DTF printer is the most important piece of equipment. You’ll need UV inks, varnish, a film, a B film, a laminator or roller, cleaning alcohol, lint-free cloths, and the hard surface to decorate. Using quality materials gives better colour, stronger adhesion, and fewer printing problems.
Step 01: Create Your Design
Start by creating your artwork in design software such as Adobe Illustrator, CorelDRAW, or Photoshop. Use high-resolution images and convert text into outlines before printing. Vector artwork usually gives the cleanest results because it stays sharp at any size. Double-check the size of your design before sending it to print. Small mistakes at this stage can waste both film and ink.
Step 02: Prepare the Printer
Load the A film into your UV DTF printer. Make sure the print heads are clean and the ink levels are full. Run a nozzle check before every printing session. Even a small blockage can leave lines or missing colours in the design. Using the correct printer settings helps produce smooth colour and clear details.
Step 03: Print the Design
The printer will print several layers during the process. It usually prints colour first, followed by white ink, and then a clear varnish layer. The UV lamps cure each layer as it prints.
This curing process makes the ink dry almost instantly, so the transfer is ready for the next stage without waiting for hours. Take a close look at the finished print. Colours should appear bright, with no streaks or gaps.
Step 04: Laminate with the B Film
Once printing is complete, place the B film over the printed A film. A laminator gives the best results because it applies even pressure across the whole design. If you do not have one, you can carefully use a hand roller. Press slowly to remove air bubbles and make sure the adhesive bonds evenly. This step is important because the B film carries the finished transfer onto the final product.
Step 05: Peel the A-Film
After lamination, slowly peel away the A film. The printed design should stay attached to the B film. Peel gently and keep the angle low. Pulling too quickly may damage small letters or fine details. If part of the design stays on the A film, press it again with the laminator before trying another peel. If your design looks blurry or needs to be resized without losing quality, consider our Vector Conversion Service for clean, scalable artwork.
Step 06: Prepare the Surface
Clean the product thoroughly before applying the transfer. Dust, grease, fingerprints, or moisture can reduce adhesion. Use isopropyl alcohol and a lint-free cloth to clean the surface. Let it dry completely before moving to the next step. A clean surface helps the adhesive bond properly and improves durability.
Step 7: Apply the Transfer
Position the transfer carefully because it cannot be moved once it sticks. Press the transfer firmly onto the surface using your fingers or a squeegee. Apply steady pressure across the entire design, paying close attention to edges and small details. Take your time during this stage for the best finish.
Step 08: Remove the Carrier Film
Wait a few moments after applying pressure. Slowly peel away the B film. The printed design should remain on the product. If any section lifts, place the film back down and press again before peeling. The finished design should appear smooth, bright, and securely attached. If you’re looking for vibrant, ready-to-press prints for garments, consider our DTF Transfers Service for durable, full-colour transfers with fast turnaround.
Which Surfaces Work Best?
UV DTF transfers work best on smooth, non-porous materials. Glass gives excellent clarity, while acrylic creates vibrant displays. Metal products look clean and professional, making them popular for promotional items. Plastic containers, phone cases, tumblers, ceramic mugs, and coated wood are great choices too. Very rough, textured, or flexible materials are usually not suitable because the adhesive cannot grip evenly.
Tips for Better UV DTF Transfers
Small improvements can make a big difference. Store your films in a cool, dry place away from sunlight. Always use clean hands when handling transfer films. Test new materials before starting large production runs.
Keep your printer well maintained and use good-quality inks for brighter colours and longer-lasting prints. Practice on inexpensive products before decorating customer orders. The more transfers you make, the more consistent your results will become.
How Long Do UV DTF Transfers Last?
When applied correctly, UV DTF transfers can last for several years. They resist water, sunlight, scratches, and everyday handling much better than many stickers or vinyl decals. Their lifespan depends on the quality of the materials, proper application, and the environment where the product is used. Indoor products often stay looking new for many years.
UV DTF Transfers vs Traditional Stickers
Although both add graphics to products, they perform very differently. Traditional stickers can peel around the edges over time. Their colours may also fade after long exposure to sunlight.
UV DTF transfers bond directly to the surface, giving a painted appearance without thick edges. They also offer better durability and a more premium finish. They are a popular choice for businesses that sell personalised gifts, promotional products, and branded merchandise.
Can You Make UV DTF Transfers at Home?
Yes, but it depends on your equipment. A complete UV DTF printing setup requires a specialised printer, UV inks, films, and curing technology. This investment may not be practical for occasional hobby use. Many individuals and businesses choose professional printing services instead.
This saves money on equipment while ensuring consistent print quality, accurate colours, and reliable adhesion. If you plan to sell customised products regularly, professional production can also help you complete orders faster.
Conclusion
Making UV DTF transfers is easier than many people expect once you understand the process. Use the right equipment, prepare the surface well, and apply steady pressure. This way, you can make colourful, lasting designs that look professional on various hard surfaces.
If you want to avoid equipment costs and get reliable results right away, The Patches Club can help. We offer premium UV DTF transfers, quick service, and expert support for every order.
FAQs
Frequently Asked Questions
No. UV DTF transfers are applied using pressure only, so a heat press is not required.
Yes. They work well on many curved items, including bottles, tumblers, mugs, and jars.
Yes. Once applied correctly, they are waterproof and suitable for everyday use.
No. UV DTF transfers are designed for hard surfaces. Fabric requires standard DTF transfers.
Most transfers can be applied in just a few minutes after the surface has been cleaned properly.
Yes, but removing them usually requires heat, adhesive remover, or careful scraping without damaging the surface.
Smooth, hard surfaces like glass, acrylic, metal, ceramic, and plastic provide the best adhesion.
High-quality UV DTF transfers resist fading and can maintain their colour for years with proper care.
Vector files such as AI, EPS, or PDF are ideal, but high-resolution PNG files also produce excellent results.
Yes. They are a reasonable way for small businesses to create customised products with a professional finish.
How to Choose the Best Hat Patch Manufacturer?
A custom hat patch can make a simple cap look professional, stylish, and memorable. Whether you need patches for your…
How to Create Custom Patches From Scratch in 2026?
Have you ever looked at a jacket, backpack, or cap and thought it would look better with a custom patch?…
How Much Do Custom Patches Cost in the UK? A Complete Guide 2026
Custom patches are a low-cost way to promote your brand, show team spirit, or add style to clothing. They are…